A long time ago, I used PGP for signing my email, but I stopped using it. Probably because I didn't quite get the concept yet, but that has changed now.

Today I switched to GPG for signing my mail and files, with all the required files running from my memory stick.

One thing bothered me however, no Outlook 2007 support at all. There are some plugins around for older Outlook versions, but that didn't quite work out.

So I decided to develop my own! And after a few weeks of development and testing, it's done and ready to be set free upon the world.

Let's have a look at the functionality and how to set it up and use it.

Prerequisites

First of all, a working copy of GPG is required, so visit the GnuPG download page, scroll down and download the command line Windows version.

Install this somewhere on your machine and remember the path where you installed it.

If everything has gone correctly, you can now open a command prompt and type gpg --version and gpg --list-keys to see the version and your keys (which would be empty if you're using it for the first time).

Visit the Getting Started section of the GnuPG handbook to generate your own key if this is your first encounter.
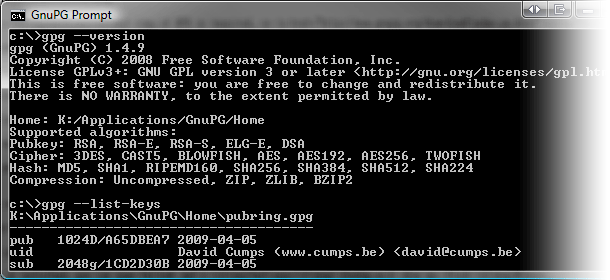
Command Line Interface

OutlookGnuPG

There are two main areas in the plugin, functionality for sending a mail (sign/encrypt) and for retrieving a mail (verify/decrypt).

At the moment only plain text emails are supported. No HTML mail or attachments, that's for a future version :)

To install the addin, start by adding www.cumps.be to your Trusted Sites (you can do this in Internet Explorer - Tools - Internet Options - Security - Trusted Sites - Sites).
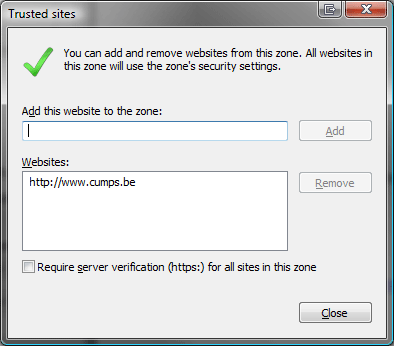
Trusted Sites

Download the OutlookGnuPG ClickOnce installer and execute it. (See Update 1 and 2 below)

This will give you a prompt asking you if everything is fine. Go ahead and install it. You might have to close Outlook before installing.
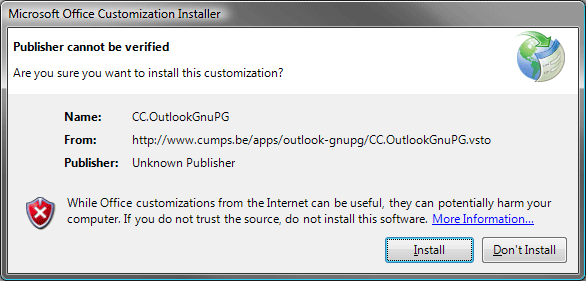
ClickOnce Installer

When the addin is installed, you can open Outlook and a Settings dialog will show up. Click Browse... and select the directory where your the gpg.exe you previously installed is located.

On the second tab you can select the default key you want to use to sign your mails. You will still have a choice to change your key upon sending the actual mail.
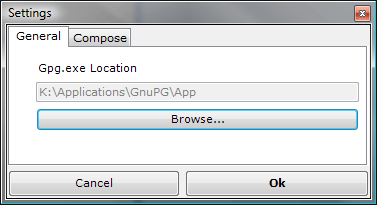
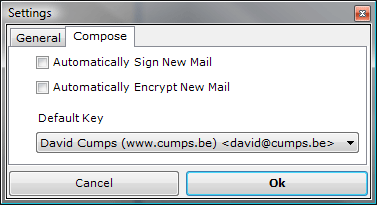
GnuPg Location

Default Key

Click Ok when done. At this point you can use your Outlook as before, since we haven't checked any auto-sign/encrypt functionality.

Sending Mail

When you compose a new mail, you will notice the Message ribbon has a new group on it, called OutlookGnuPG, with a Sign and Encrypt toggle button.
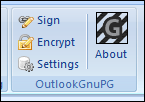
Compose Ribbon

Sending out a signed mail is as simply as turning on the Sign button, typing your mail and pressing Send. It will prompt you to select the private key you want to use to sign the mail, and your passphrase.
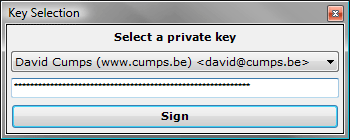
Passphrase Window

Creating an encrypted mail follows the same logic, toggle the Encrypt button and send your mail. You will have to select the intended recipients (multiple are possible) and it will encrypt the mail so only these people will be able to decrypt it.
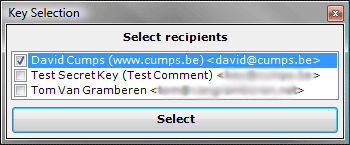
Recipient Window

To be absolutely safe, you can toggle both Sign and Encrypt button to send out an encrypted signed message.

Retrieving Mail

Reading mail can be done in two ways in Outlook, either by opening the mail item, or by using the preview pane. It only makes sense there are two ways to verify/decrypt a mail as well then.

The first is very identical to the send functionality. When you open an existing mail, you will notice a new ribbon group, OutlookGnuPG, with a Verify and Decrypt button.

Read Ribbon

Simply click Verify to check if a signed mail is valid or not. A messagebox will inform you of the status.
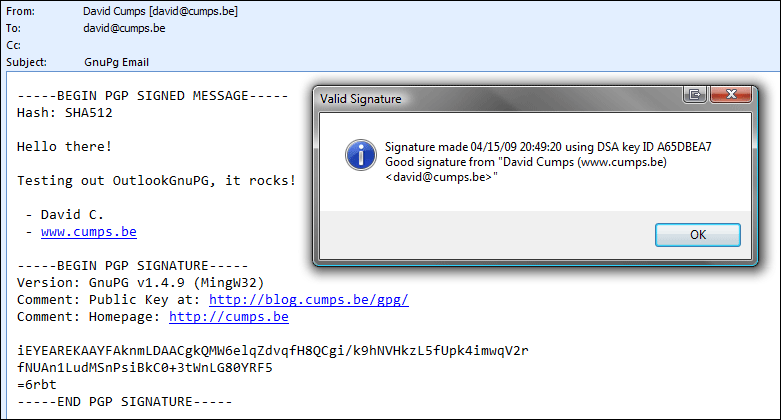
Valid Signature

Likewise, click Decrypt to decrypt an encrypted email. This will ask you for your private key to decrypt the message with. The message will be decrypted, and the decrypted content will be placed in the message. If the message was also signed, a messagebox will inform you of the status.

The second way is through the preview window. A new commandbar will have appeared on the preview window, with a Verify and Decrypt button, which work exactly the same as the previous buttons.

CommandBar

Credits

OutlookGnuPG is free, only supported by a donate button, so it's only fair to give the used resources some credits.

Silk Icon Set by Mark James OpenPGP wrapper by Starksoft Clipboard Wrapper by Alessio Deiana
AboutBox

Feedback

Got questions? Remarks? Feel free to leave a comment :)

Update: Since I won't have the time to maintain this, I'm releasing the source: cc.outlookgnupg-1.0.8.0.zip

Update 2: Philippe Teuwen and Thierry Walrant have taken it upon themselves to improve the code I posted above and made it available on github, using GPLv3 as a license. Check it out at: github.com/twalrant/OutlookGnuPG

 
Deze post is geïmporteerd van de oude blog en is nog niet geconverteerd naar de nieuwe syntax.
Yesterday I talked about personalizing Outlook Today to make it look more sexy. One of the things I had on my Outlook Today, was my picture with a direct link to my contact details. This link looked like this:

[html]
Contact Details
[/html]

As you can see, I'm pointing to 0000000031490E5EAED5DA4AAB47FD1B9F1E6BA7E43D2D00. This is the name Outlook internally assigned to my contact details, but how did I find it?

To figure this out, I wrote an Outlook Add-in which simply gives me the internal name of any selected item, be it a mail, appointment, contact or task, as shown here:

GuidFinder Result

Creating this Add-in was quite easy with Visual Studio 2008. I started by creating a new project of the type Office - 2007 - Outlook Add-in, which results in one class presenting you two important methods:

[csharp]
private void ThisAddIn_Startup(object sender, System.EventArgs e)
{
}

private void ThisAddIn_Shutdown(object sender, System.EventArgs e)
{
}
[/csharp]

Using the following MSDN resources, I quickly hacked a small Outlook Add-in together, which would give me an additional menu item.
GuidFinder Menu Item


To add a new button, I changed the code from the article a bit, to look as follows:

[csharp]
#region Add menu item
private void AddMenuBar()
{
try
{
// Get the current menu bar.
this.menuBar = this.Application.ActiveExplorer().CommandBars.ActiveMenuBar;

// Add a new item to the menu bar.
this.newMenuBar = (CommandBarPopup)menuBar.Controls.Add(
MsoControlType.msoControlPopup, missing,
missing, missing, false);

// Add the menu bar if it doesn't exist.
if (this.newMenuBar != null)
{
this.newMenuBar.Caption = "GuidFinder";
this.newMenuBar.Tag = this.menuTag;

// Add a new menu item to the menu.
this.getGuidButton = (CommandBarButton)newMenuBar.Controls.Add(
MsoControlType.msoControlButton, missing,
missing, 1, true);

// Layout the menu item.
this.getGuidButton.Style = MsoButtonStyle.msoButtonIconAndCaption;
this.getGuidButton.Caption = "Get GUID";
this.getGuidButton.FaceId = 25; // Looking Glass icon
this.getGuidButton.Click += new _CommandBarButtonEvents_ClickEventHandler(this.getGuid_Click);

// Make our result visible.
this.newMenuBar.Visible = true;
}
}
catch (System.Exception ex)
{
MessageBox.Show("Error: " + ex.Message.ToString(), "Error Message Box", MessageBoxButtons.OK, MessageBoxIcon.Error);
}
}
#endregion
[/csharp]

The FaceId property defines the icon which will be displayed next to your menu item. To get a list of possible icons, have a look at these images.

When you run the Add-in at this stage, buttons will keep on adding themselves to Outlook every time you run it. Therefore we need to write some code which removes the button in case it already exists:

[csharp]
#region Remove Menu item
private void RemoveMenubar()
{
// If the menu already exists, remove it.
try
{
CommandBarPopup foundMenu = (CommandBarPopup)
this.Application.ActiveExplorer().CommandBars.ActiveMenuBar.
FindControl(MsoControlType.msoControlPopup,
missing, menuTag, true, true);

if (foundMenu != null)
{
foundMenu.Delete(true);
}
}
catch (System.Exception ex)
{
MessageBox.Show("Error: " + ex.Message.ToString(), "Error", MessageBoxButtons.OK, MessageBoxIcon.Error);
}
}
#endregion
[/csharp]

Clicking on the Get GUID button should give us the internal name of the item, for which we use the following code to display it:

[csharp]
#region Display the Guid
private void getGuid_Click(CommandBarButton ctrl, ref bool cancel)
{
try
{
// Get the selected item in Outlook and determine its type.
Selection outlookSelection = this.Application.ActiveExplorer().Selection;

if (outlookSelection.Count > 0)
{
string itemGuid = string.Empty;
object selectedItem = outlookSelection[1];

if (selectedItem is MailItem)
{
MailItem mailItem = (selectedItem as MailItem);
itemGuid = mailItem.EntryID;
}
else if (selectedItem is ContactItem)
{
ContactItem contactItem = (selectedItem as ContactItem);
itemGuid = contactItem.EntryID;
}
else if (selectedItem is AppointmentItem)
{
AppointmentItem apptItem = (selectedItem as AppointmentItem);
itemGuid = apptItem.EntryID;
}
else if (selectedItem is TaskItem)
{
TaskItem taskItem = (selectedItem as TaskItem);
itemGuid = taskItem.EntryID;
}
else if (selectedItem is MeetingItem)
{
MeetingItem meetingItem = (selectedItem as MeetingItem);
itemGuid = meetingItem.EntryID;
}

if (itemGuid != String.Empty)
{
MessageBox.Show(String.Format("The GUID of this item is {0}", itemGuid), "Guid", MessageBoxButtons.OK, MessageBoxIcon.Information);
}
else
{
MessageBox.Show("The item type could not be determined.", "Error", MessageBoxButtons.OK, MessageBoxIcon.Error);
}
}

}
catch (System.Exception ex)
{
MessageBox.Show("Error: " + ex.Message.ToString(), "Error", MessageBoxButtons.OK, MessageBoxIcon.Error);
}
}
#endregion
[/csharp]

Wiring up everything in the end, is as simple as first checking if our menu already exists and removing it, to afterwards add it to Outlook again.

[csharp]
private void ThisAddIn_Startup(object sender, System.EventArgs e)
{
this.RemoveMenubar();
this.AddMenuBar();
}
[/csharp]

Once again, I uploaded a zip file, containing the source code, together with the files from my previous Outlook Today article. The solution is created with Beta 2 of Visual Studio 2008 and works with Outlook 2007. This small GuidFinder Add-in is a nice start to discover the full potential of Outlook Add-ins.

If you aren't interested in the code, but would like to have this Add-in installed in Outlook 2007, run the ClickOnce installer to deploy it on your computer. This installer will get all prerequisites needed to run the Add-in (.NET 3.5) and the Add-in itself. If you get an error about an untrusted certificate, add wiki.cumps.be to your Trusted Sites zone.

I belief this is a very powerful technology to use inside a company and provide added value to your employees, making them more productive through useful add-ins. Thanks to the ClickOnce technology it's easy to deploy add-ins to clients and keep them updated.

What do you think about .NET Outlook Add-ins and ClickOnce?
 
Deze post is geïmporteerd van de oude blog en is nog niet geconverteerd naar de nieuwe syntax.
Do you find Outlook Today too boring? I do! Let's have a look at how we can transform it into something more visually appealing, something like this: (click the image for a full view)

Outlook Today - David Cumps

But just how do you achieve this? Start by creating a fresh HTML page and add the following just below your title tag:

[html]


[/html]

Afterwards, unleash your graphical talents in Photoshop or any other editor and design something beautiful, designate some zones you would like to have, and convert it to HTML.

At the location you'd like to have your Calendar events, add the following snippet:

[html]


[/html]

The code to see your Tasks is as follows:

[html]


[/html]

Displaying the message count consists out of two actions, first we have to add it to our layout as follows:

[html]


::

[/html]

Afterwards, have a look at the following registry entries:

[code]
[HKEY_CURRENT_USER\Software\Microsoft\Office\12.0\Outlook\Today\Folders]
"0"="\\\\Cumps David\\Inbox"
"1"="\\\\CumpsD\\Inbox"
[/code]

As you can see, I have two entries in my Messages section, displaying my Exchange and POP3 Inbox. Entries are simply numbered with their value being the location of the item you want to count. You can also leave this as it is by default if you wish to.

Displaying the Date is a small piece of Javascript:

[html]

[/html]

I also added some New links next to Messages, Calendar and Tasks. The code for this is as follows:

[html]
New Mail
New Appointment
New Task
[/html]

Additionally you can add external links as well. In my example I am calling two PHP scripts, running on my local webserver, which output some Javascript, my system's uptime and an RSS feed. The following code is an example of an external link and an included PHP script:

[html]
David Cumps

[/html]

You might wonder what my picture is doing there. Well, it's a direct link to my own Contact item, since I can't remember my own phone number, I usually copy paste it from my contact details. This way I simply get to those details faster :)

Once you have completed your layout, place it somewhere on your hard disk or personal webspace and add the following registry key:

[code]
[HKEY_CURRENT_USER\Software\Microsoft\Office\12.0\Outlook\Today]
"Url"="file://path_to_your_htm"
[/code]

In my case this results in:

[code]
[HKEY_CURRENT_USER\Software\Microsoft\Office\12.0\Outlook\Today]
"Url"="file://C:\\OutlookToday\\cumpsd.htm"
[/code]

The next time you open Outlook, it will load your webpage, ready to be used.

I uploaded a zip file containing the files used in my Outlook Today. Included are two PHP scripts, one to parse an rss feed, and one for the Windows uptime. In the cumpsd.htm file you can also view all available css styles which Outlook supports. Have a look at it and feel free to modify it to get a quick start. If you create something, leave a comment showing off your creation please, I'm always interested in seeing what others accomplish.

Enjoy modifying your Outlook Today! Personalize your computer!